When it comes to analyzing blog traffic stats, we have ample amount of tools to analyze your blog stats.
You must have heard about the Jetpack Plugin for WordPress which gives very good and broad information on your Site’s Stats?
Although after all these, even if you aren’t satisfied with the results of traffic tracking then one ultimate solution is Google Analytics.
What is Google Analytics?
Google Analytics is a free web analytics service offered by Google that tracks and reports website traffic. Google launched the service in November 2005 after acquiring Urchin. Google Analytics is now the most widely used web analytics service on the Internet. (source: Wikipedia)
Google Analytics is a very useful Tool for Bloggers, special WordPress originated like:
- Organized Important Data at First: If there is one (or more) pieces of data you want to see at a glance every time you log in to your analytics, be sure to set it up in the Dashboards area. You can create multiple dashboards, each of which can contain multiple widgets.
- Find highest Competitive Campaigns bring huge traffic: By using Google Analytics, you can track all the sources from where you are getting the traffic to decide the highest paying Campaign.
- Location based determination of Visitors: Thanks to Google Analytics, Now you can simply look under your Visitors menu to see the Location demographics of your visitors to get a glance about from where your traffic is coming. It gives you access to see worldwide stats, including an average time on site spent by a single user and also bounce rate of visitors from particular countries.
And a lot of other uses of Google Analytics are there which can be claimed of free without paying a single penny. So, what you waiting for?
The whole setup will be finished in two major steps:
- Setting Up Google Analytics Account
- Adding Google Analytics to WordPress Blog
Setting up Google Analytics Account:
Let’s get started first by setting up your Google Analytics account for your WordPress blog which we will connect with your blog later in the tutorial.
It’s not necessary to have WordPress only, you can also try the below methods for any other CMS platforms too.
1) If you are doing this for your first Blog site, then first you need to go to Google analytics home page and log in using your Google account or create an account which is also free.
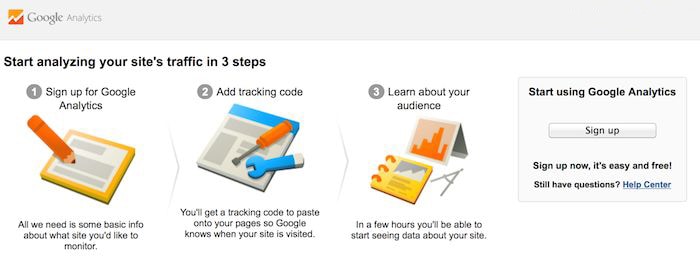
After that, for the first time setup, you will be asked to add your website details and your personal details to get started.
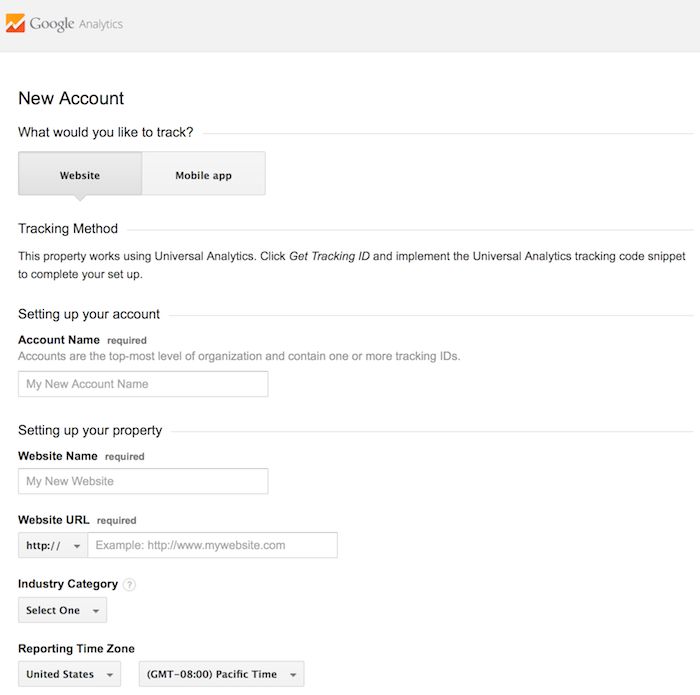
After entering all details, Click on Get Tracking Code and you will get a unique tracking code for your WordPress blog which will look something like UA-*****-2-42.
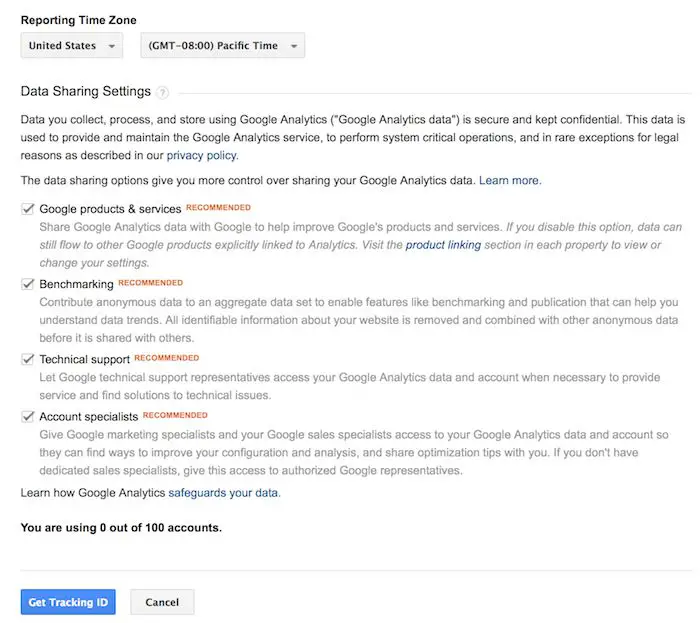
Cheers! That’s all. Till this point, you have successfully created setup your Google Analytics account and also got the Tracking Code.
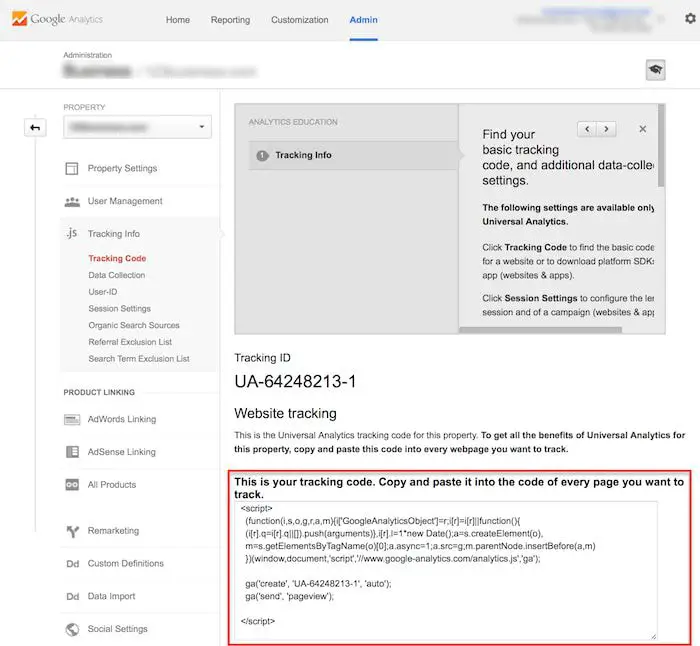
Now it’s time to initiate the process of Adding Google Analytics to WordPress blog.
Adding Google Analytics to WordPress Blog
It’s time to Add the Google Analytics to your WordPress blog which can be done very easily using many methods.
I believe, using the Google Analytics Plugin will be the best encase of newly setup, depending upon your level of blogging you should pick one of the below-mentioned methods.
Method 1: Using MonsterInsights WordPress plugin
I personally believe, for any level blogger, using the Google Analytics Plugin to add the Tracking Code and Start checking the stats is the best and very easy way.
Even in the Plugins, There are many plugins that are available in the WordPress Plugin repo to add Google analytics to your WordPress blog, but the MonsterInsights is the best one in my case.
To add Google Analytics to WordPress, the steps below are to be taken;
- Go to MonsterInsights and Download the Plugin
- Navigate to the WordPress site you want to add the Analytics plugin to
- Go to the admin dashboard and click on “Plugins”
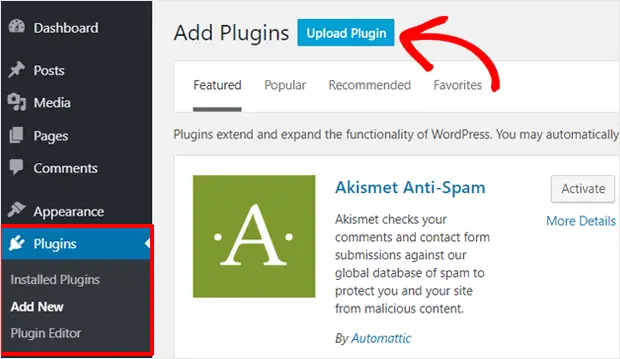
- From the drop-down options, click on “Add New” and then, “Upload Plugin” at the top of the screen.
- Click on the “Choose File” icon on the new page and select the zip file for the Google Analytics you just downloaded.
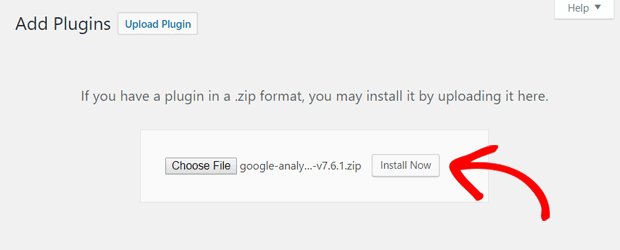
- Click on the “Install Now” icon after adding the zip file.
- After installing the plugin successfully, click on the “Activate Plugin” to activate the plugin on your WordPress site

- When the plugin is activated successfully, you will get a step-by-step guide to put you through the setup process
- If you are using the MonsterInsights plugin, you will get a welcome message, then an option to select your website category from; the blog/publisher site, business website and eCommerce.

- Select your website category, and then click on the “Save and Continue” icon to proceed. If you want to skip the setup, for now, you can select the “Exit setup icon”
- Now, you can connect your MonsterInsights plugin to your website after adding your MonsterInsights License key, accessible from the email receipt or account details on your plugin page
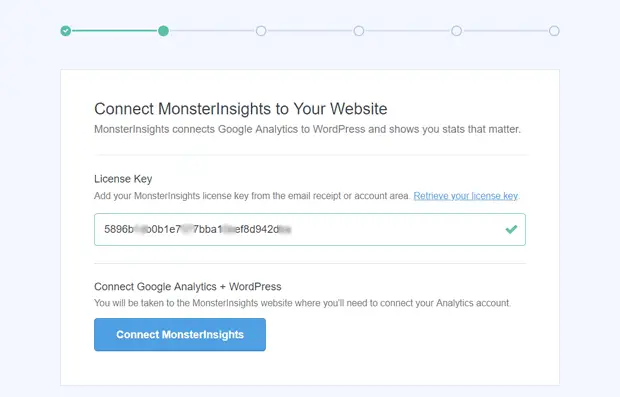
- After you enter your license key, your account will be verified.
- Click on the “Connect MonsterInsights” icon and then, select the option to connect your MonsterInsights account with Google Analytics.
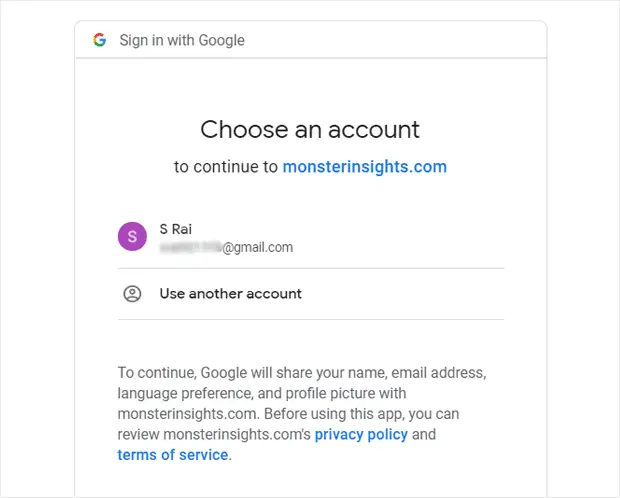
- Connect your email account and continue to the authentication page
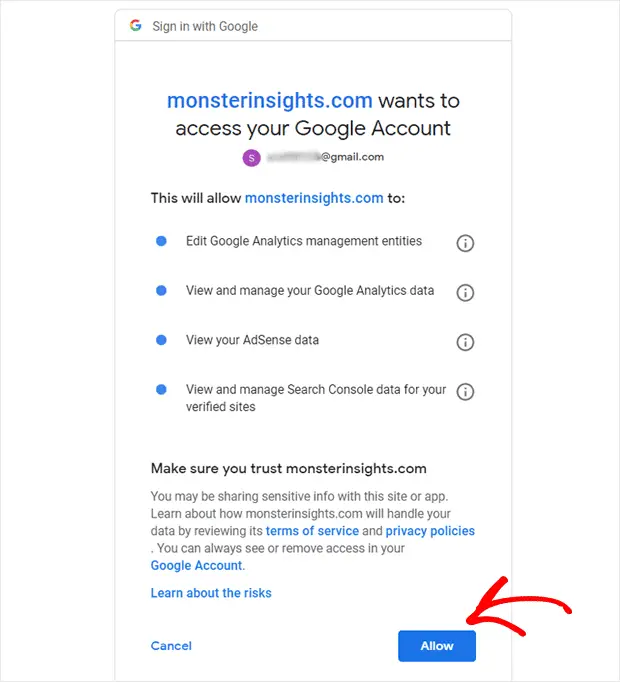
- Allow MonsterInsights access your page and grant the needed permissions
- Now, you have to pick a profile to complete the connection. If you use multiple websites on your Google Analytics account, ensure you pick the right website property.
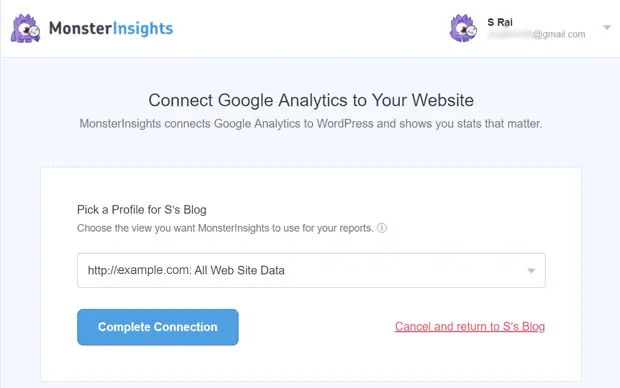
- After selecting your profile, click on the “Complete Connection” icon
- Wait a few seconds for the authentication process to be completed
- You will be redirected to the MonsterInsights page where you can see the recommended settings for the Google Analytics plugin
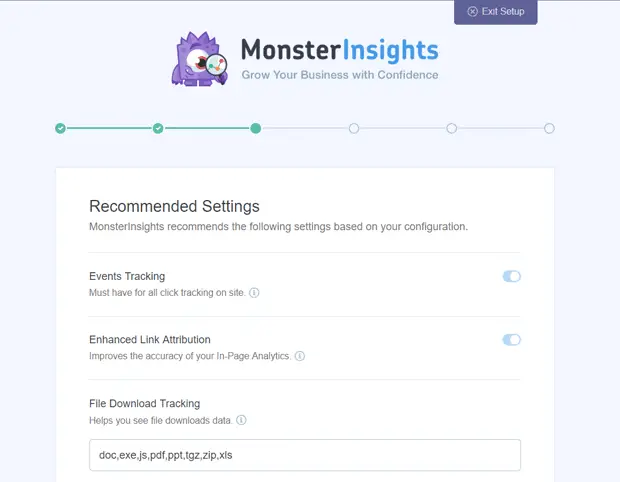
- On the page, you will get acquainted with important settings like events tracking, Enhanced link attribution and File download tracking that are all enabled by default
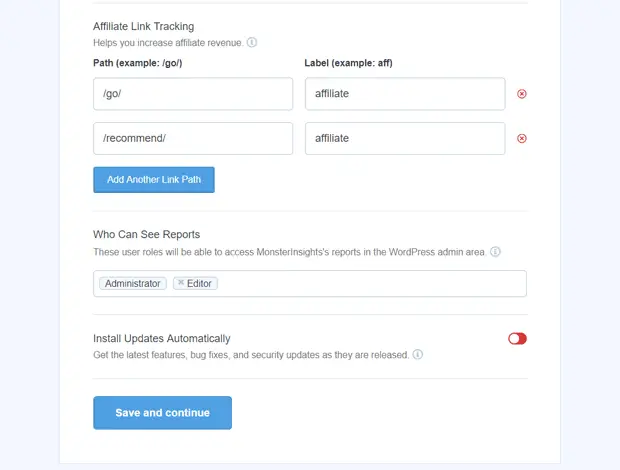
- Down the page are other settings that can be edited and configured to personal preference.
- Click on “Save and Continue” when the settings have been configured to your taste
- On the next page, you will be directed to install some recommended add-ons including WPForms
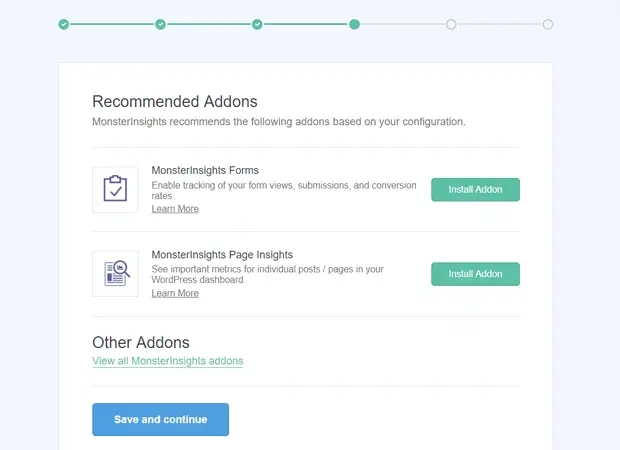
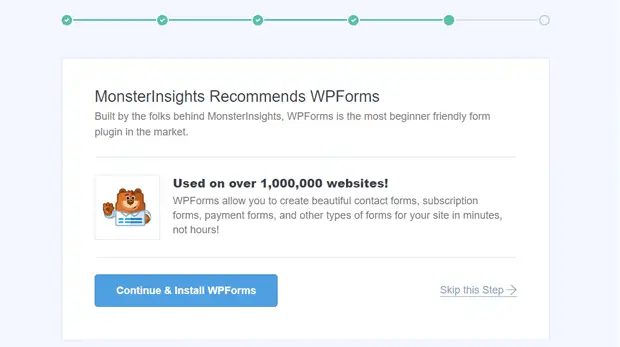
- If you do not need the recommended addons, you can skip the step
- On the next page, you will receive a message that implies a successful setup, “Awesome, You’re All Set”
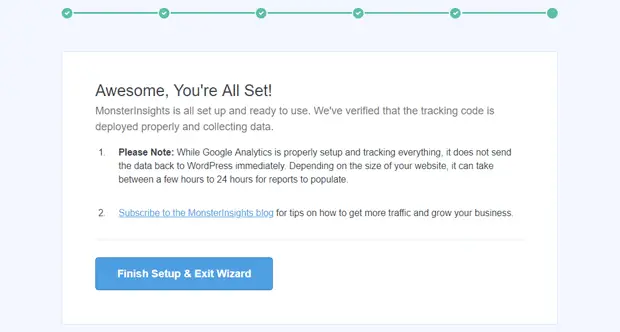
- Click on the “Finish Setup and Exit Wizard” icon on MonsterInsights
- Now your Google Analytics metrics on your WordPress dashboard.
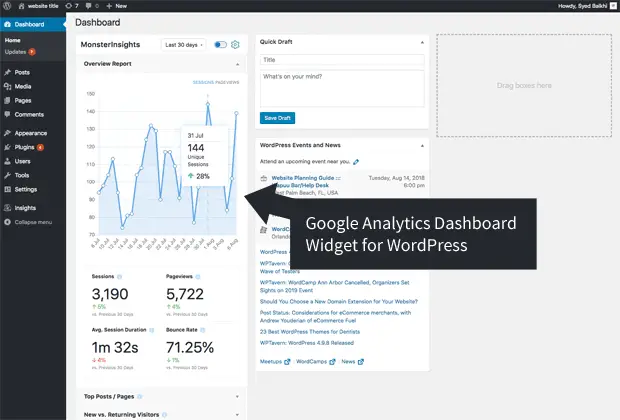
Remember your website reports will be visible only after a few hours (usually between 5 to 24hours) depending on the size of your website.
Plugin Alternative: If you want to see Google Analytics data in your dashboard, Analytify is one useful plugin for you which allows you to see the real-time stats of the site staying on Dashboard only.
Method 2: Manually by Accessing your WordPress Theme
Your access to the Header and the Footer section of the Theme files by default to placing the code.
If you are using Genesis framework, There is also an inbuilt feature.
It can be simply copy the tracking code which you obtained from the Analytics site, and now go to theme setting option, look for an option to add a footer script, and paste the code.
Genesis > Theme Settings> and paste it under footer script box.
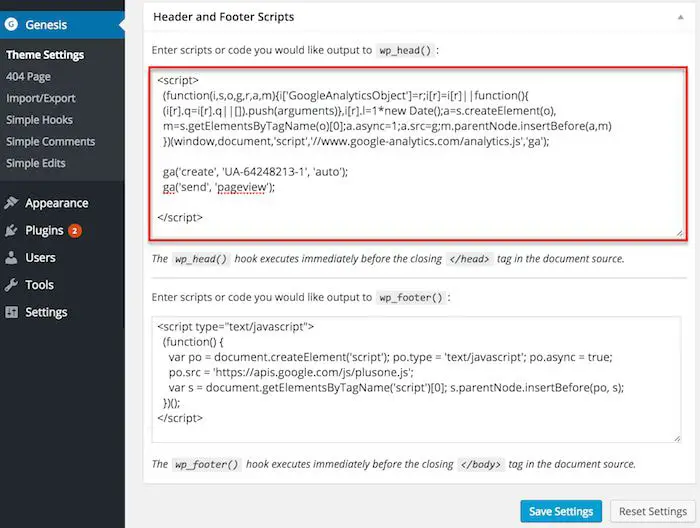
It will work smoothly and moreover, you don’t actually have to rely on any other plugin for adding Google Analytics to your WordPress blog but you don’t get any great feature such as provided by MonsterInsgiths.
Although it might be quite hectic for the newly started bloggers once you setup then need not to worry at least until you change the whole CMS 😉
Wrapping UP!
By Adding Google Analytics to your blog, you actually like climbing onto a new step in Blogging.
Also let me know in the comments section below about any other method if you know?
Or which one you choose for adding Google analytics to WordPress blog for yours. Cheers!

