If you are in search of an alternative means of connecting your WordPress website leads to your Salesforce CRM, without coding experience or assistance, then you have to connect your WordPress forms to your Salesforce account.
To do this, you need an addon plugin for WordPress that has CRM compatibility, a user-friendly interface, and a Salesforce add-on.
With a long list of plugins in the market offering great functions and compatibility options, WPForms offers users the most amazing support and features.
WordPress Salesforce Integration with WPForms
WPForms offer website owners a user-friendly platform for both basic and professional use with easy setup, tools and several customization options.

With WPForms, users have access to very easy but functional drag and drop feature, already-made templates and several other tools that help you build as many forms as you want over a short period.
Salesforce offers several amazing features to website owners that help improve customer relationship management and also allow online businesses to operate using cloud technology to connect visitors, customers, and partners, creating a better work environment with advanced technology.
With the Salesforce addon released on WPForms, you can now enjoy a more direct and automatic connection for your WordPress leads on Salesforce with no need for extra services like Zapier, other manual admins, and any coding knowledge.
Before we go into the step by step procedure on WordPress Salesforce Integration, let’s look into the benefits of connecting these 2 platforms.
- With the advanced services of Salesforce and WPForms completing each other, users will enjoy great time-saving services as they can easily organize form entries in their Salesforce account without copying the entries to the account or writing any code. This is possible with the automatic synchronization available to users since WPForms became a Salesforce add-on.
- Various tasks like customer tracking, sales processing and documentation, and more are made easier with the custom tools available on Salesforce. WordPress Salesforce integration will do the work for you.
- Aside from several other amazing services and features of the WordPress Salesforce integration, you get to save money that should have been used to pay for manual admins and other services that connect leads to Salesforce.
Since the best way to integrate WordPress and Salesforce is with the WPForms plugin, we will discuss a step-by-step procedure on how to connect WordPress using WPForms on Salesforce. They include;
1. Step up your Salesforce account
Ensure you have the latest version and you have API access
- Ensure your Salesforce version is up to date and also check if your Salesforce account has API access to avoid unnecessary setbacks or issues.
- Check your Salesforce edition/plan. There are four editions available on Salesforce, which are; the Enterprise Edition, Developer Edition, Unlimited Edition and Performance Edition. Your Edition/plan is visible on the title region of your browser tab when you are logged on your Salesforce account.
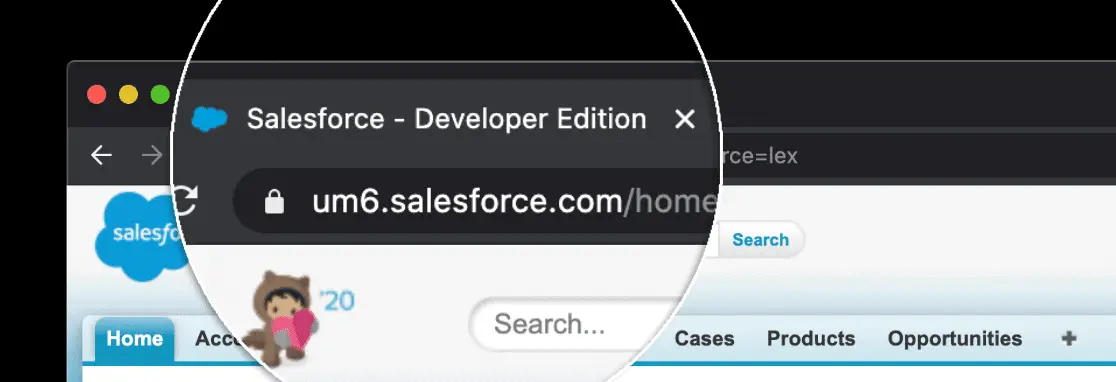
- If you are not registered to either of the mentioned Salesforce editions/plans, you should contact Salesforce customer service to fix this issue.
- If you have an edition on Salesforce which guarantees your API access, you can continue with the next steps but it is advisable to leave the Salesforce tab open so you can easily go back to it
2. Setup your WordPress plugin
- Since you will be using the WPForms plugin, which provides the best means of connecting WordPress leads to Salesforce, you need to install WPForms and activate it on WordPress.
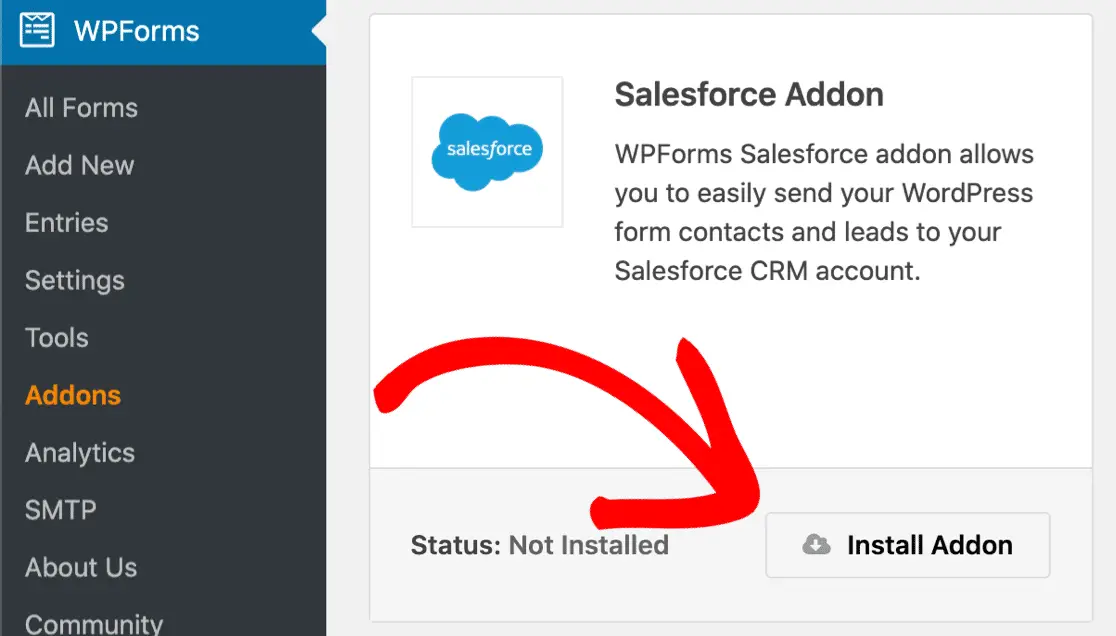
- After a successful installation of WPForms on WordPress, you need to install the Salesforce addon for WPForms.
- To do this, click on the WPForms “Addons” icon that is located toward the end of the sidebar.
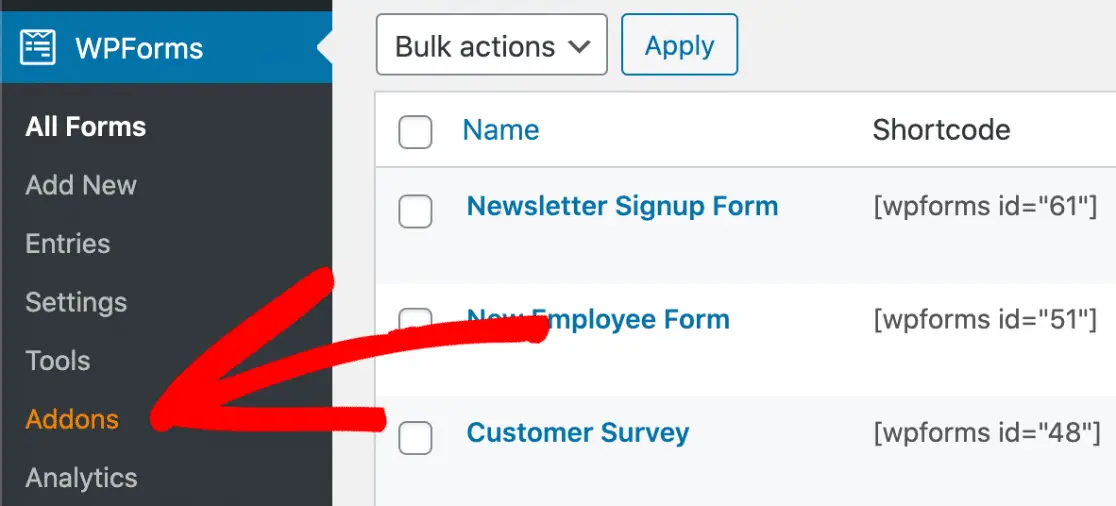
- Follow the on-screen instructions to install Salesforce Addon by clicking on the “Install Add-on” button
3. Setup Salesforce WordPress Integration
- To make a connection between the Salesforce app and WPForms plugin, you need to set up the Salesforce app.
- Log in to your Salesforce account if you haven’t done that already
- Ensure your Salesforce layout is on Classic, if not switch to the Salesforce Classic layout from the app settings
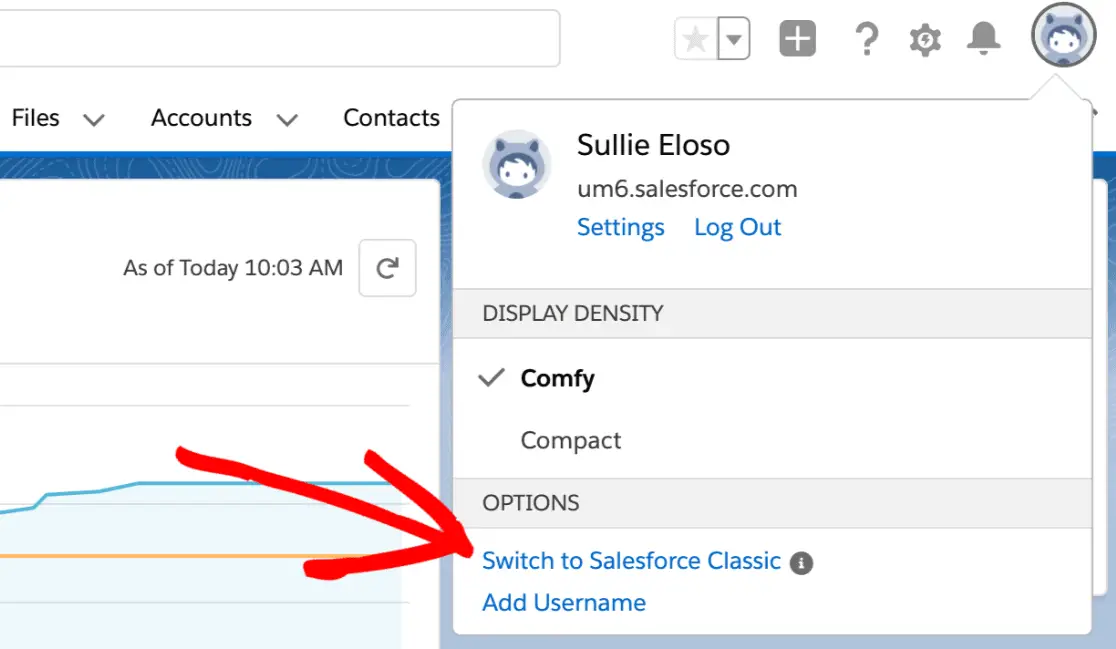
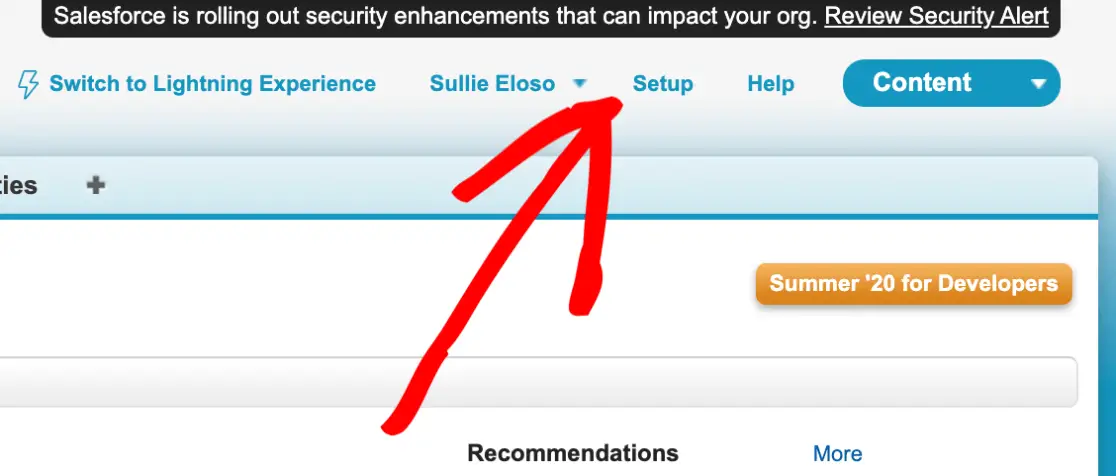
- On the Classic layout, click on the icon that reads “Setup” located on the top of your browser’s page
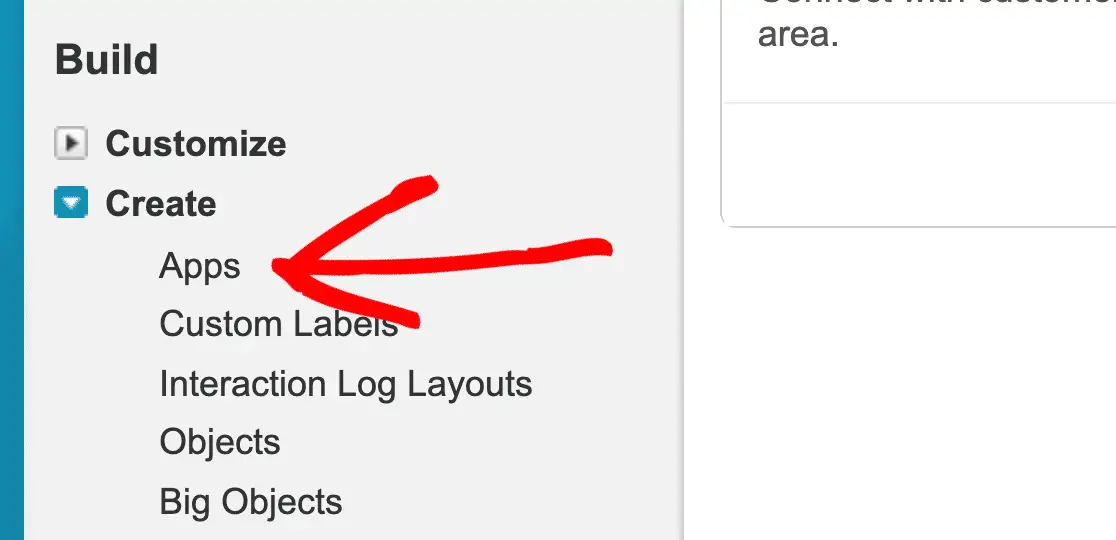
- From the drop-down menu, click on the option, “Build” and then “Apps”
- On the section of the page that has connected apps, click on “New”

- Fill in the required fields with the name of the app you want to connect, that is, “WordPress Site”
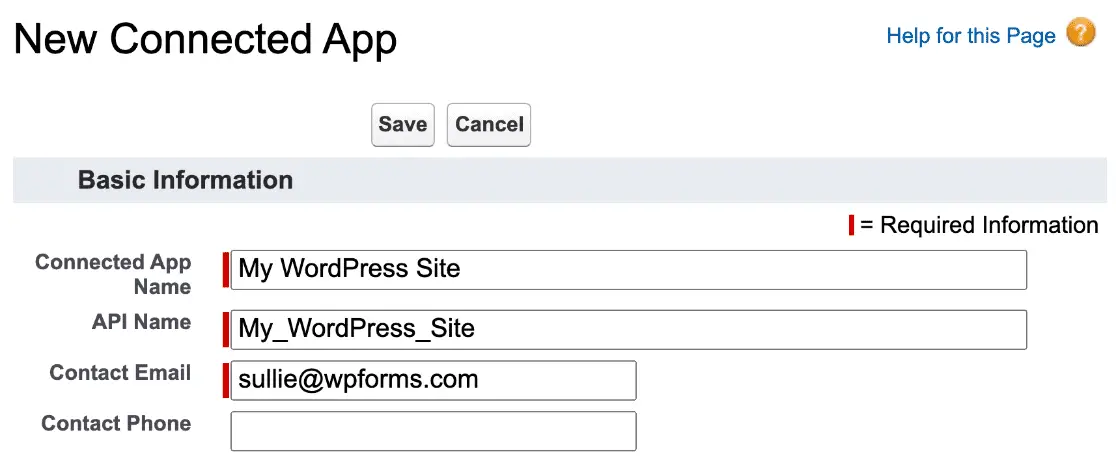
- Save your settings and it is done.
4. Set your Salesforce app permissions
- To do this, go to the API section of the Salesforce app and mark “Enable OAuth Settings”

- Now, you have to paste the WPForms URL on Salesforce.
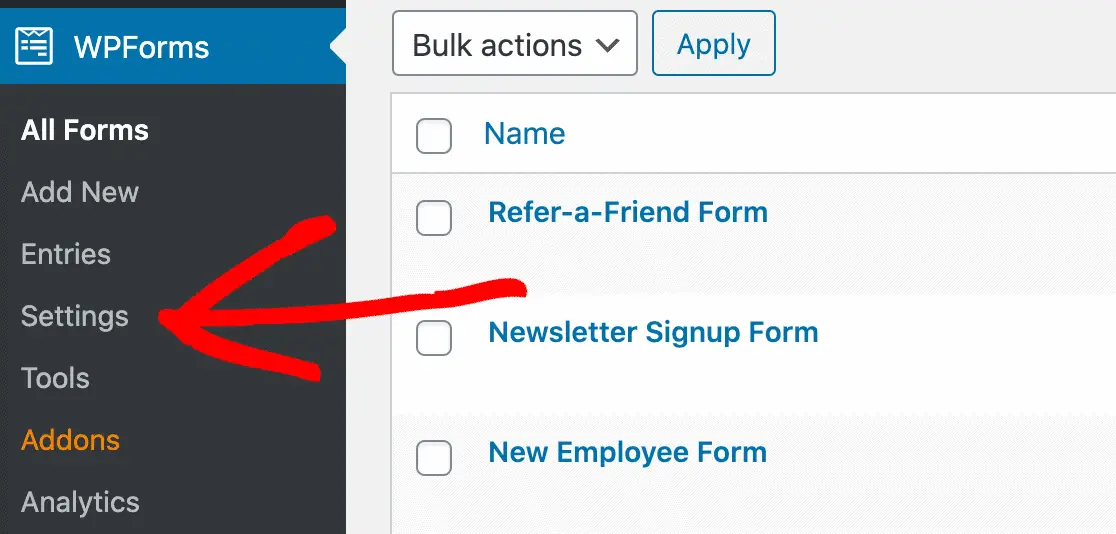
- Return to the WordPress site page that was visited during the second step and click on the “Settings” tab
- From the tabs lined up horizontally on the top of the screen, click on the icon that reads, “Integrations”

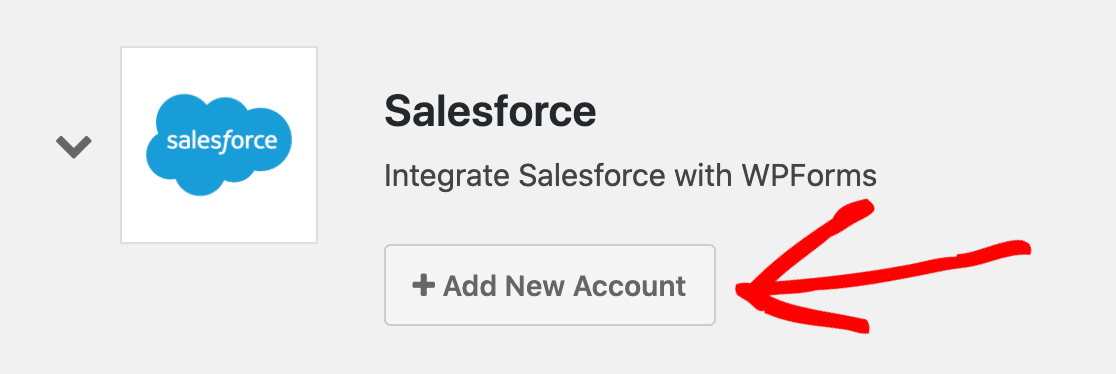
- Scroll down the page that comes up and search for the “Salesforce” icon.
- Click on the arrow on the left side of the Salesforce logo to expand the options
- Open the “Add New Account” box and copy your URL from the field that named “Callback URL”
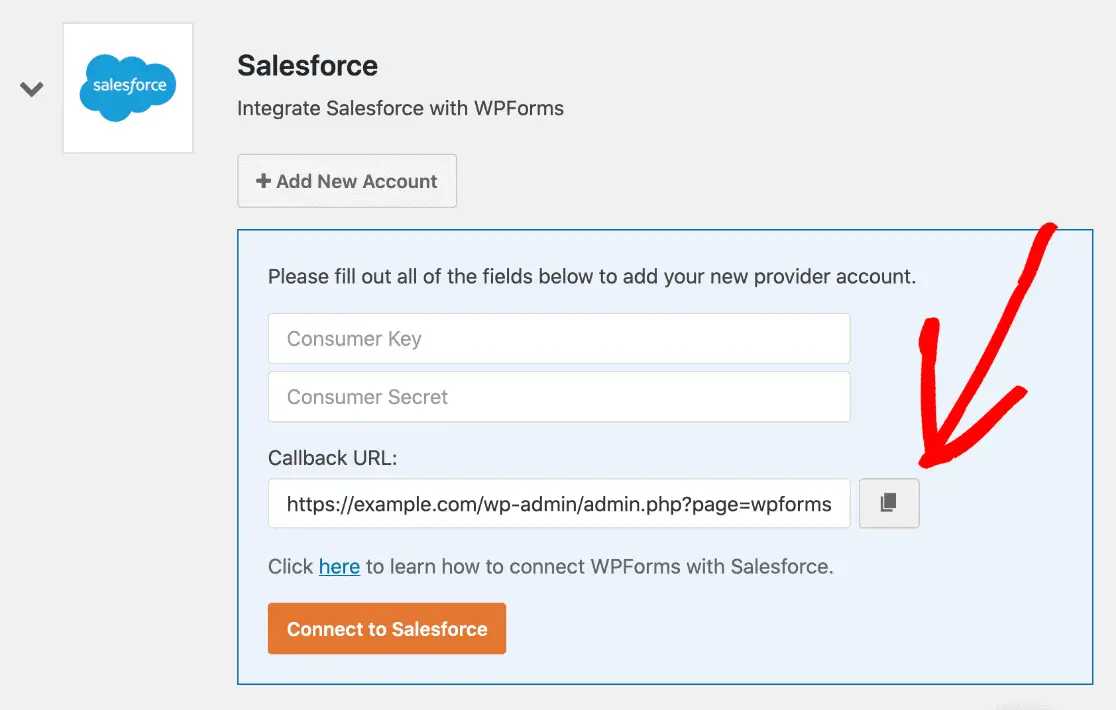
- Go back to the Salesforce page and paste the link in the required field.

- Scroll to the “Selected OAuth Scopes” tab and find the items, “Access and manage your data (API)” and Perform requests on your behalf at any time (refresh_token, offline_access)
- Add the two permissions to the “Selected OAuth Scopes” field, using the arrows on the right.

- Click “Save” on the bottom of the screen
- Don’t rush to the next stage, as you may receive an error message which comes up when your connection in Salesforce is not completely set up. It is advisable to wait at least 10 minutes before proceeding and if the error code persists each time you try to advance, just wait a few more minutes.
5. Connect WordPress to Salesforce
- After successful Salesforce setup, you need to copy the API keys to WordPress. Ensure you keep the 2 pages open so that you can easily divert through the pages
- Next to the Consumer key on the Salesforce page, click on the “copy” button
- Go to the WPForms page and paste the link on the first blank field
- Back on the Salesforce page, select, “Click to reveal” next to the “Secret Key”
- Copy the link and paste it on the WPForms page also, on the next blank field.
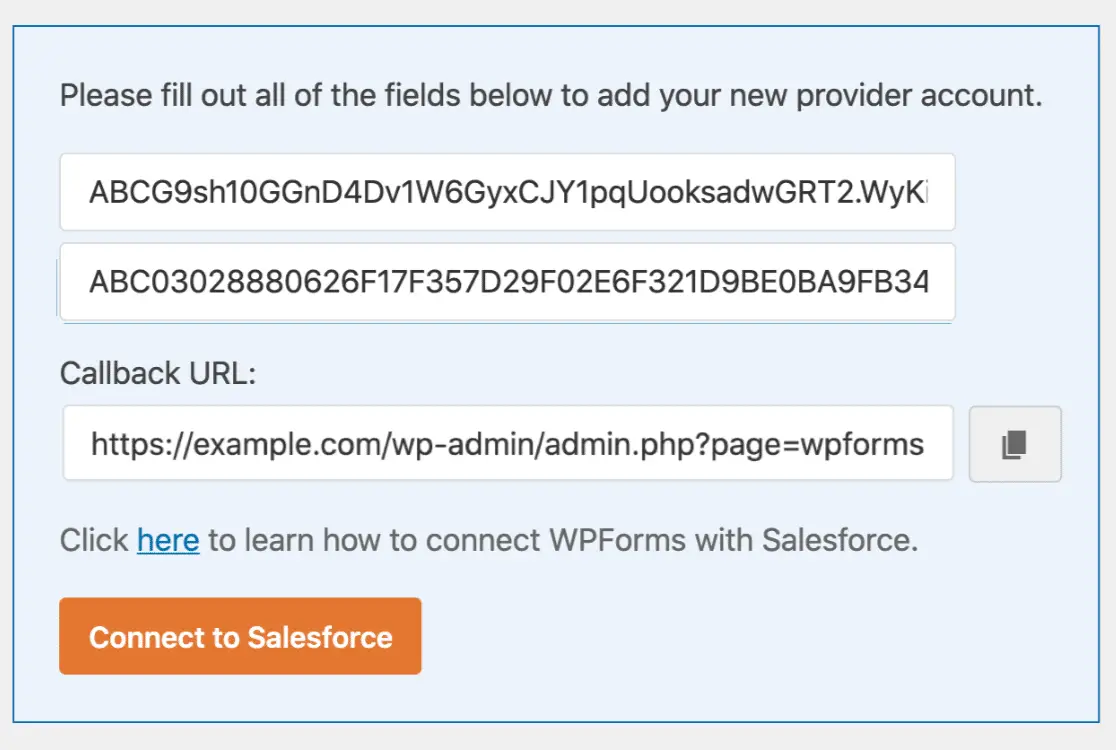
- Click on the icon, “Connect to Salesforce”
- If required to log in to your Salesforce account again, do so by providing the required information
- Allow access by clicking on the “Allow” button
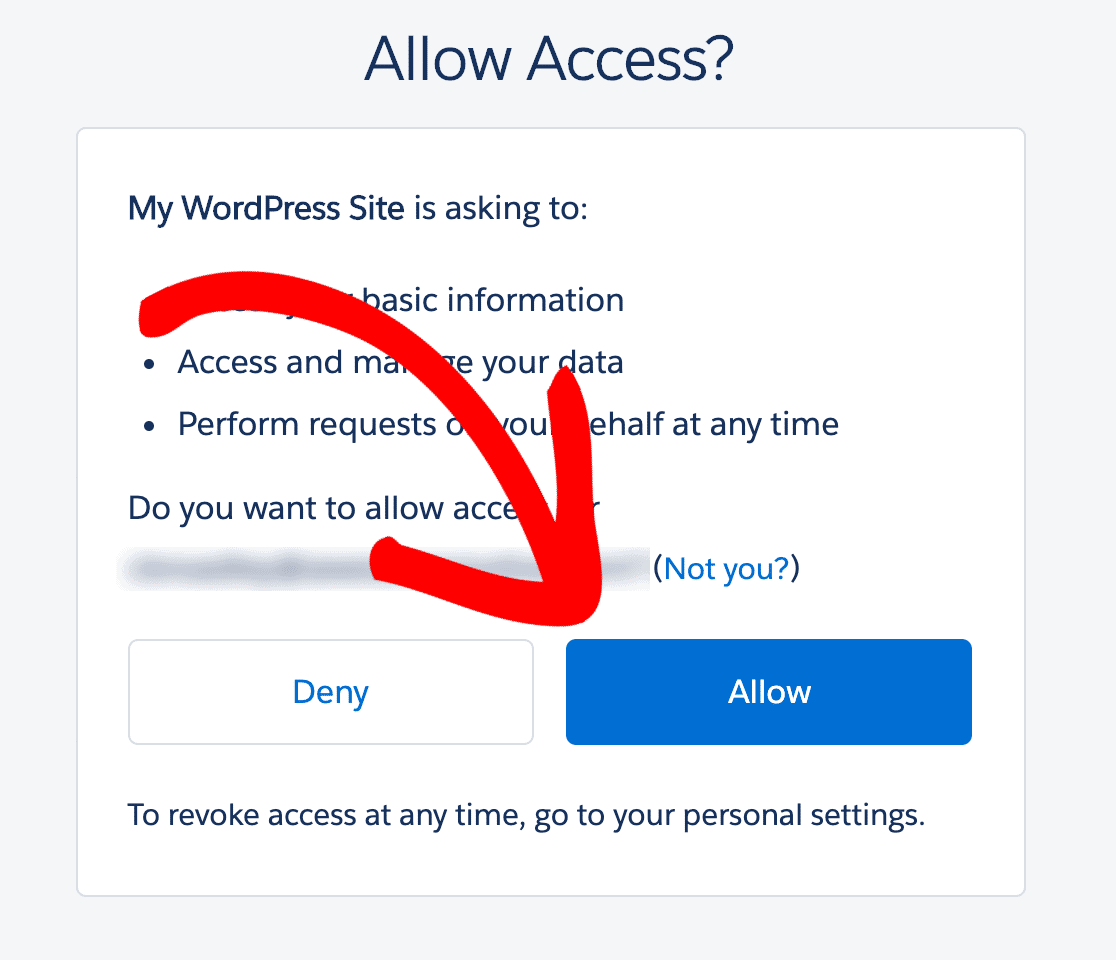
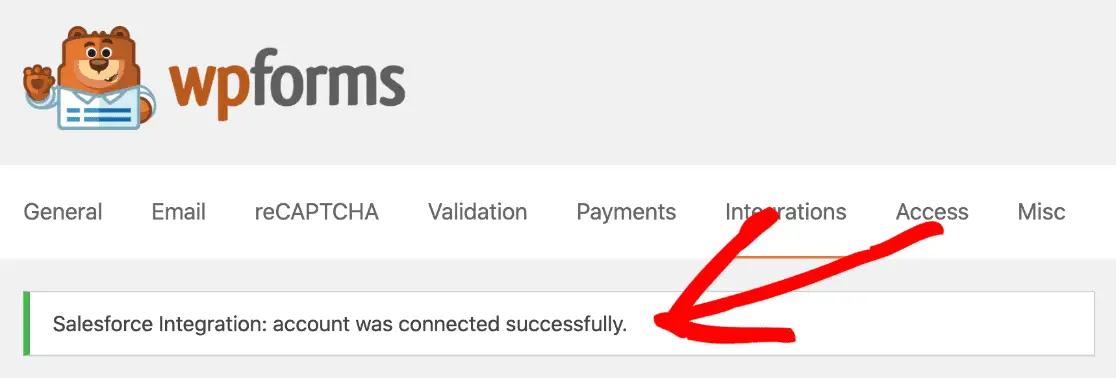
- Now, you have completed the integration process for WordPress and Salesforce and connected the accounts

6. Setup your WordPress form for Salesforce with WPForms,
You can connect any WordPress forms or leads to Salesforce and create different objects on the different forms. To connect your forms;
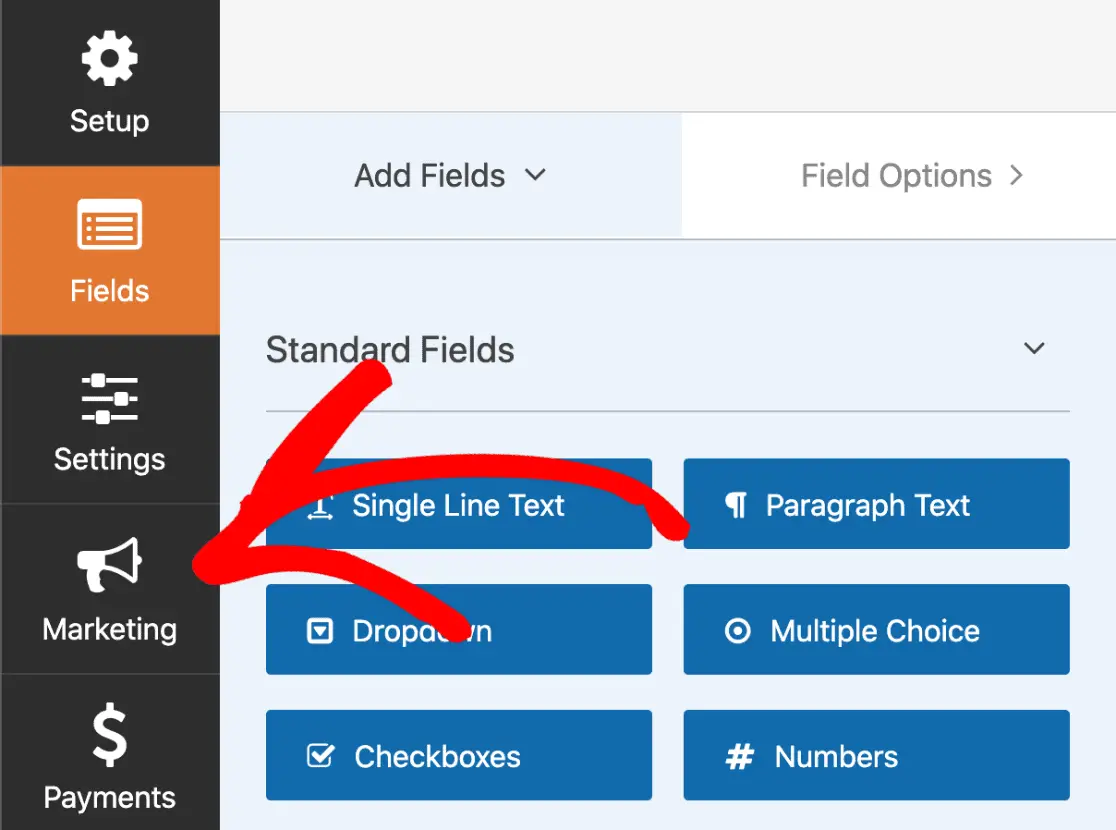
- Click on the “Marketing” icon on the left side of the page beneath the Settings option
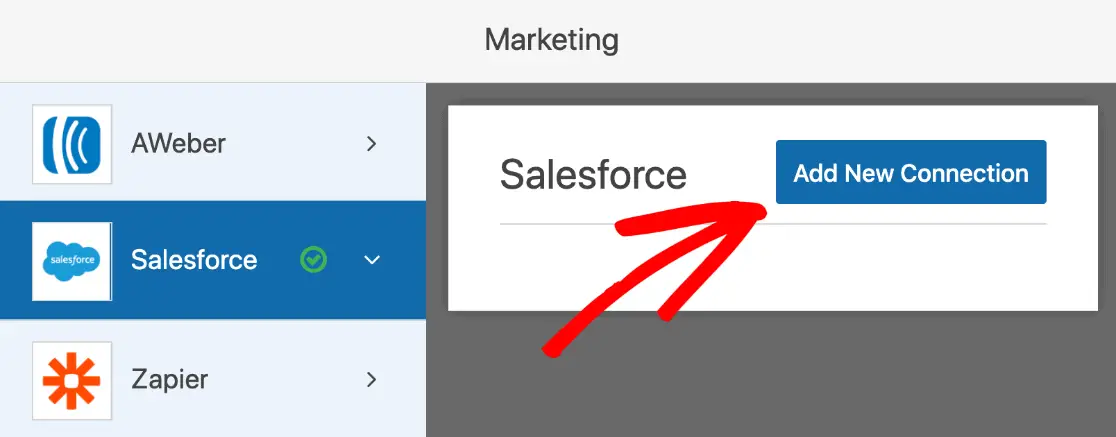
- Select the “Salesforce option, then click on, “New Connection”
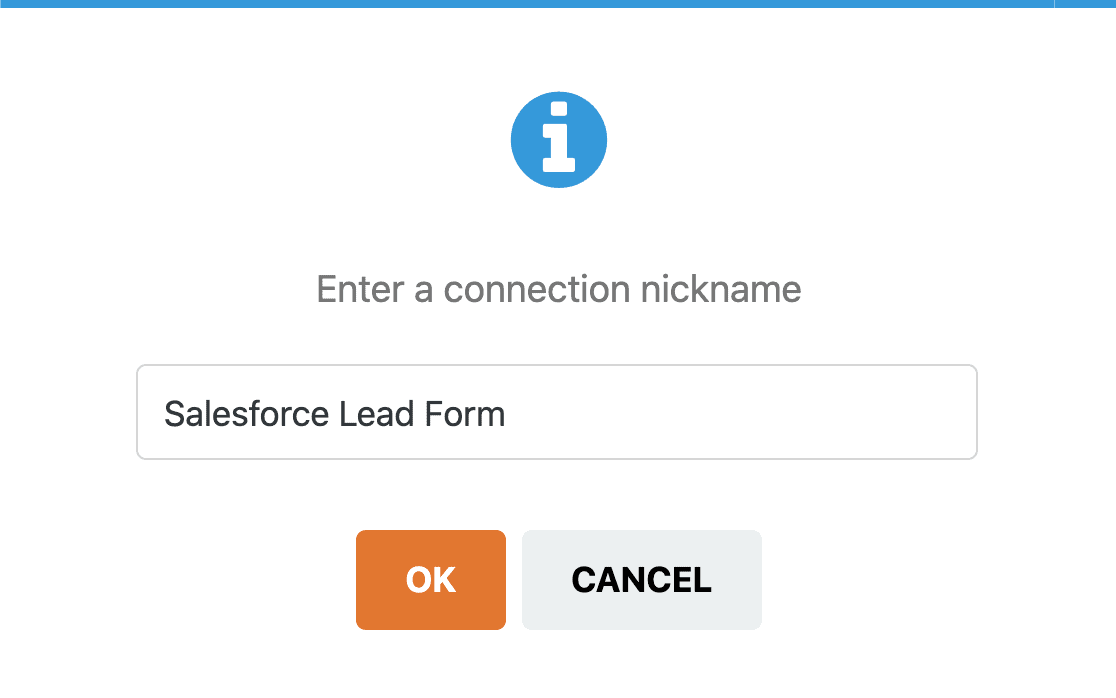
- You will be asked to name your new connection. Be sure to give it a name that is related to Salesforce in a pattern you can recognise easily for easy identification in future.
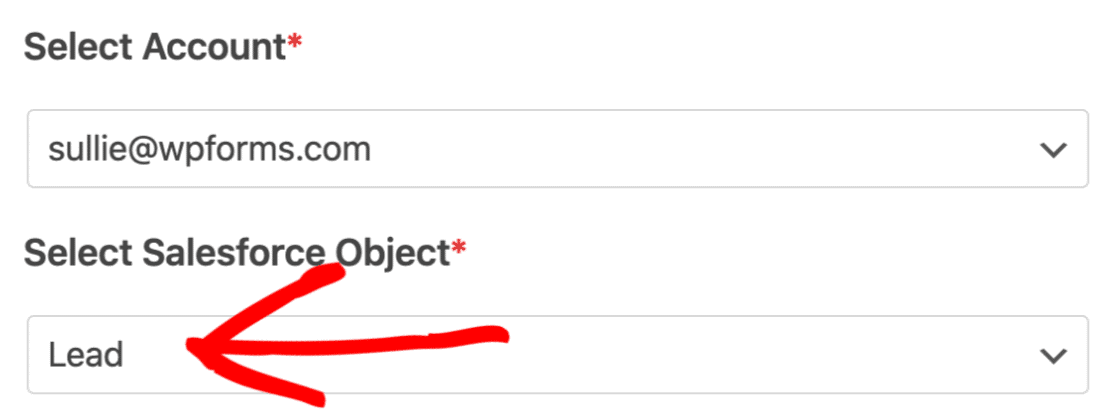
- Choose the initial Salesforce account you setup and select “Lead” on the “Select Salesforce Object” field.
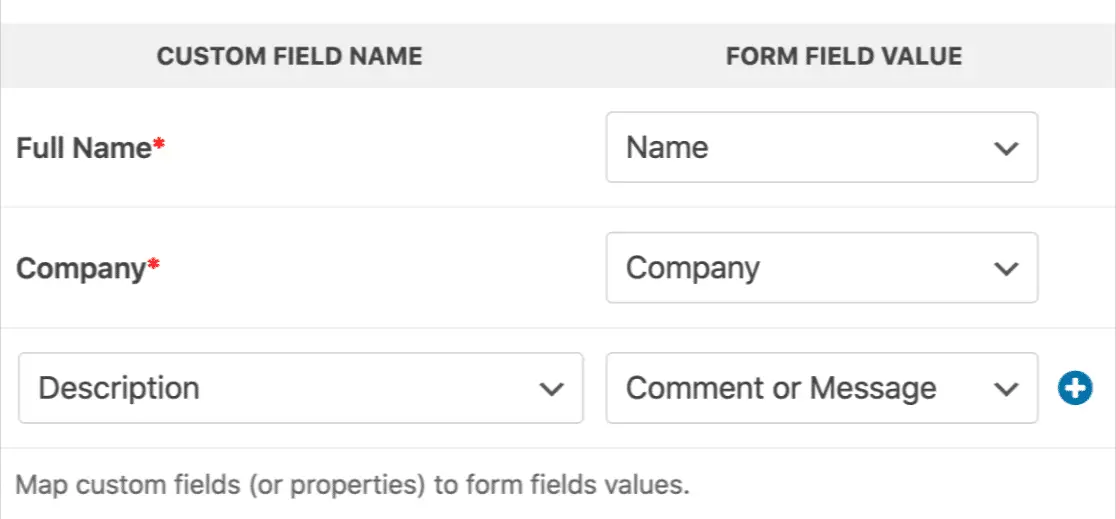
- After that, you can save the form after mapping the fields in the Lead section of the contact form.
Your WordPress and Salesfocus setup is now complete and you can enjoy the features and services of this integration automatically.

